If you’re a business owner or sales professional using ActiveCampaign, you know how critical it is to keep accurate records of calls and texts. Manually logging these interactions is tedious, error-prone, and consumes valuable time—time better spent engaging with customers and closing deals.
Pro Tip: Although Kixie doesn’t offer a native, direct integration with ActiveCampaign like it does with HubSpot, Salesforce, or Pipedrive, you can still automate your call and SMS logging by leveraging Kixie’s powerful webhook capabilities with platforms like Zapier.
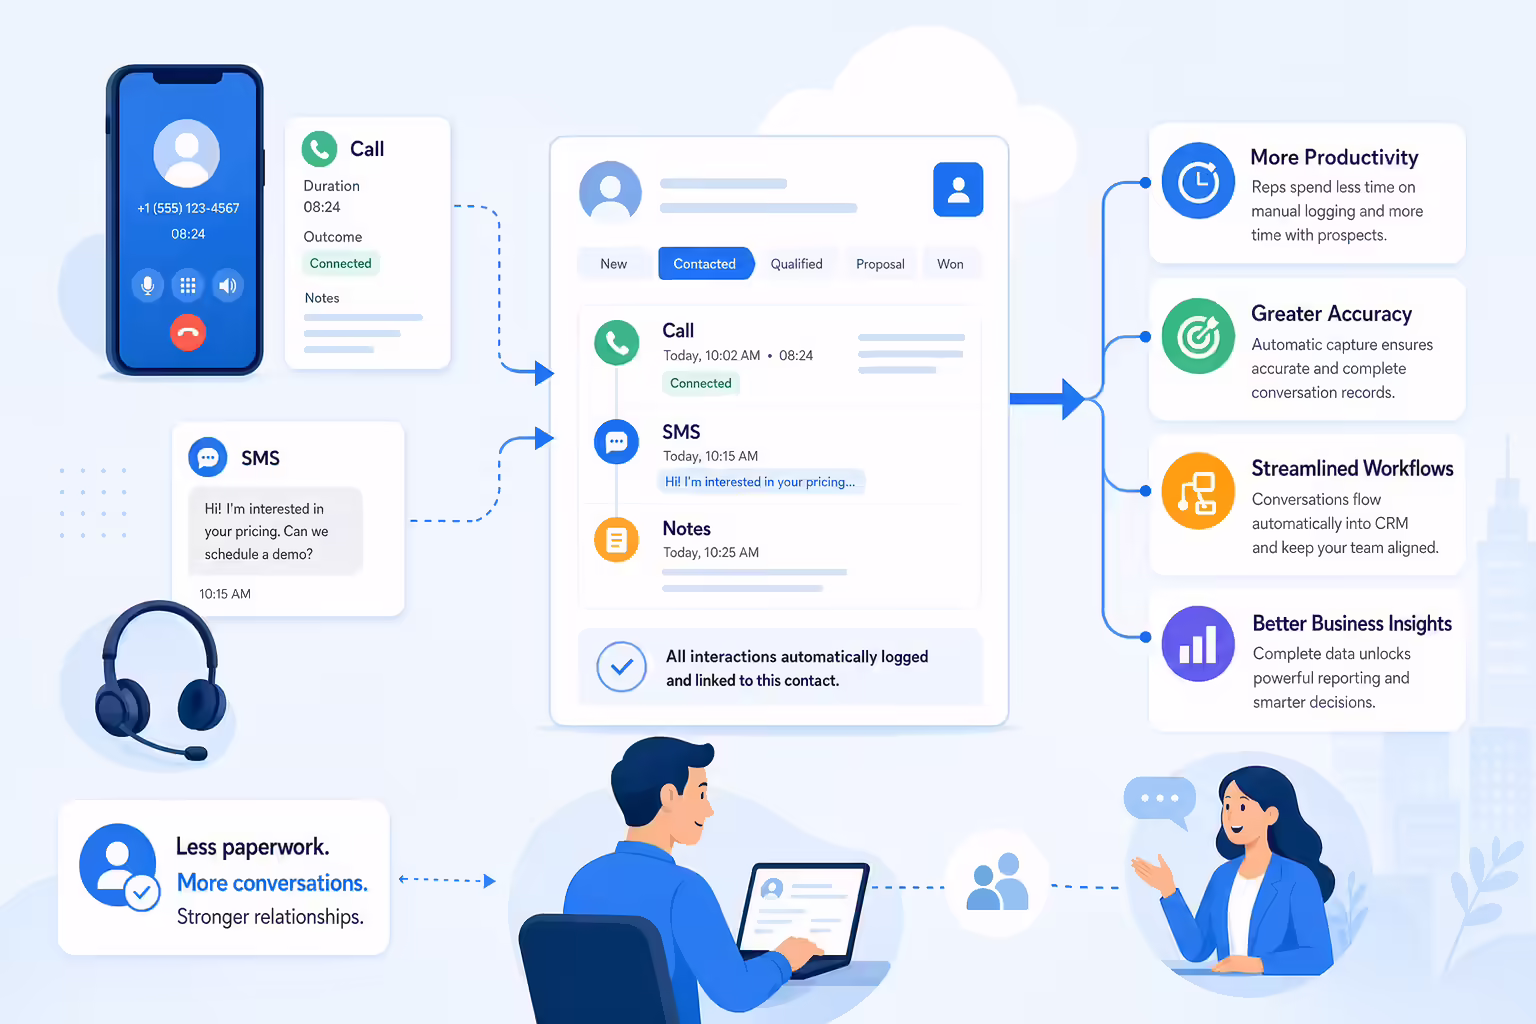
Why Automatic Logging Matters for Your Business
Improved Productivity: Automation reduces administrative tasks, freeing your sales team to focus on prospects rather than paperwork.
Accuracy & Completeness: Automatically capture essential details—call duration, outcomes, SMS content—to maintain accurate CRM records.
Streamlined Workflows: Keep your team within a single system, eliminating constant app switching.
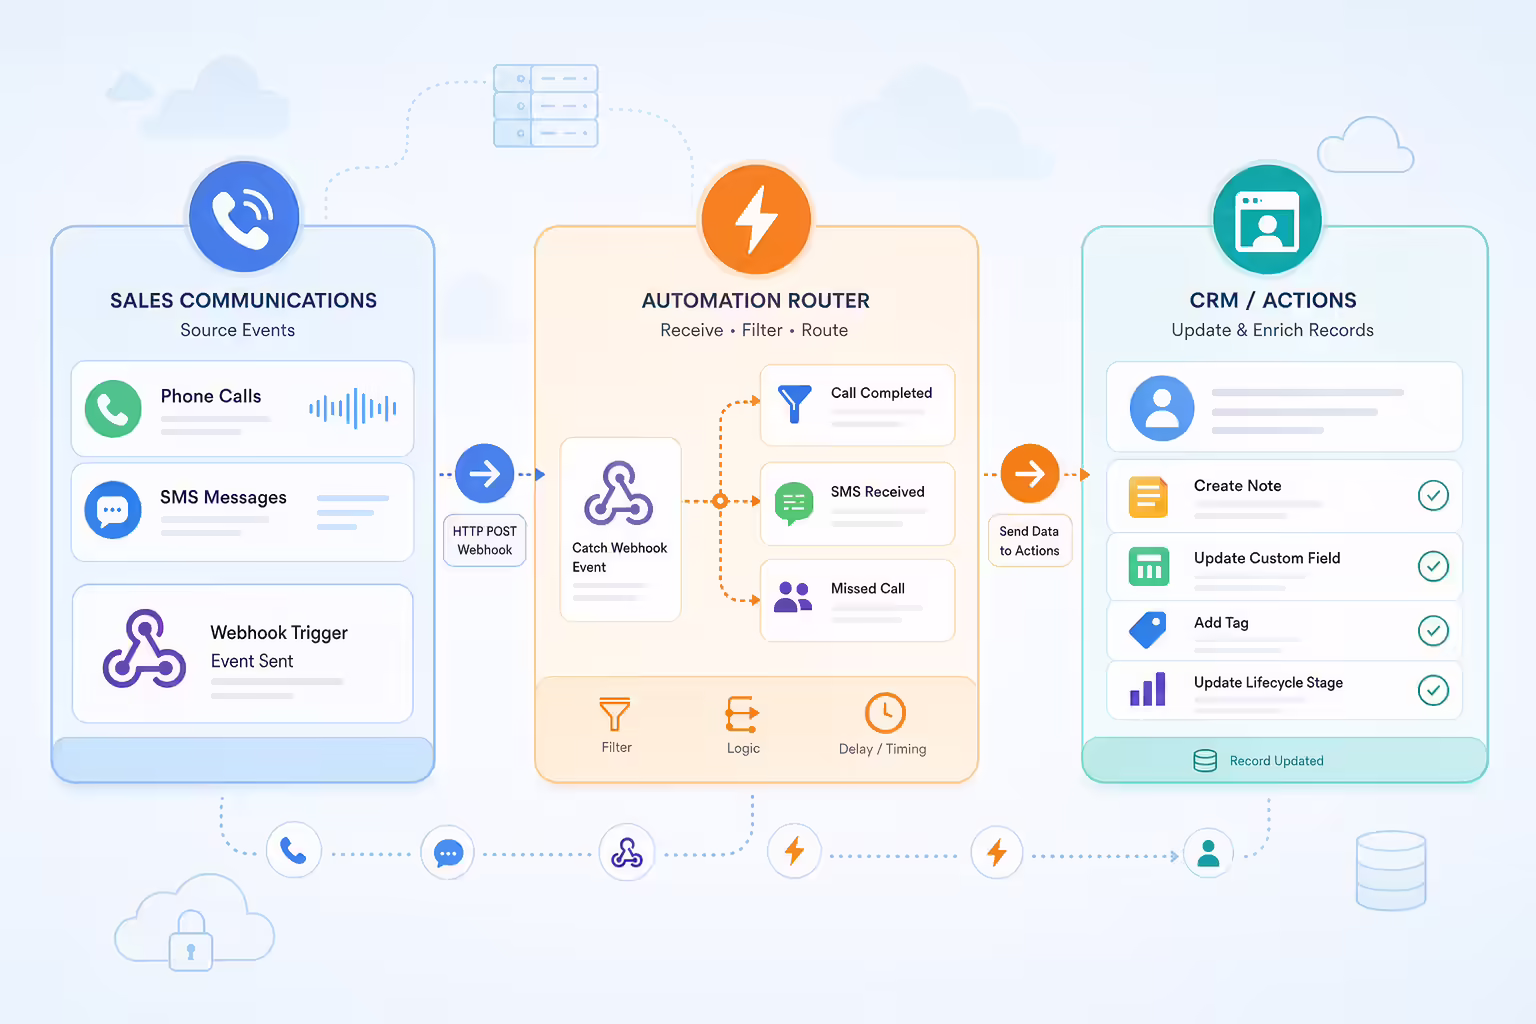
How to Set Up Automated Logging with Kixie Webhooks and Zapier
Step 1: Set Up Your Kixie Webhooks1. Log into your Kixie admin dashboard and go to Webhooks under the ‘Manage’ menu.
2. Click Add and name your webhook (e.g., “ActiveCampaign Call Logging”).
3. Select events such as End Call (for call details), Disposition (for outcomes and notes), and SMS Sent/Received.
4. Obtain your Zapier Webhook URL to connect Kixie to Zapier.
Step 2: Configure Zapier to Catch Kixie Webhooks1. Create a new Zap in Zapier.
2. Choose Webhooks by Zapier as the Trigger and select “Catch Hook”.
3. Copy the Zapier-generated webhook URL and paste it into your Kixie webhook setup.
4. Test by making a call or sending an SMS through Kixie.
Step 3: Set Up Zapier Actions for ActiveCampaign1. Add an Action step in Zapier and select ActiveCampaign.
2. Choose the desired action—such as creating notes or updating custom fields—to log call/SMS details.
3. Map the incoming webhook data from Kixie to the appropriate ActiveCampaign fields (e.g., call duration, message content).
4. Confirm the action by testing your Zap.
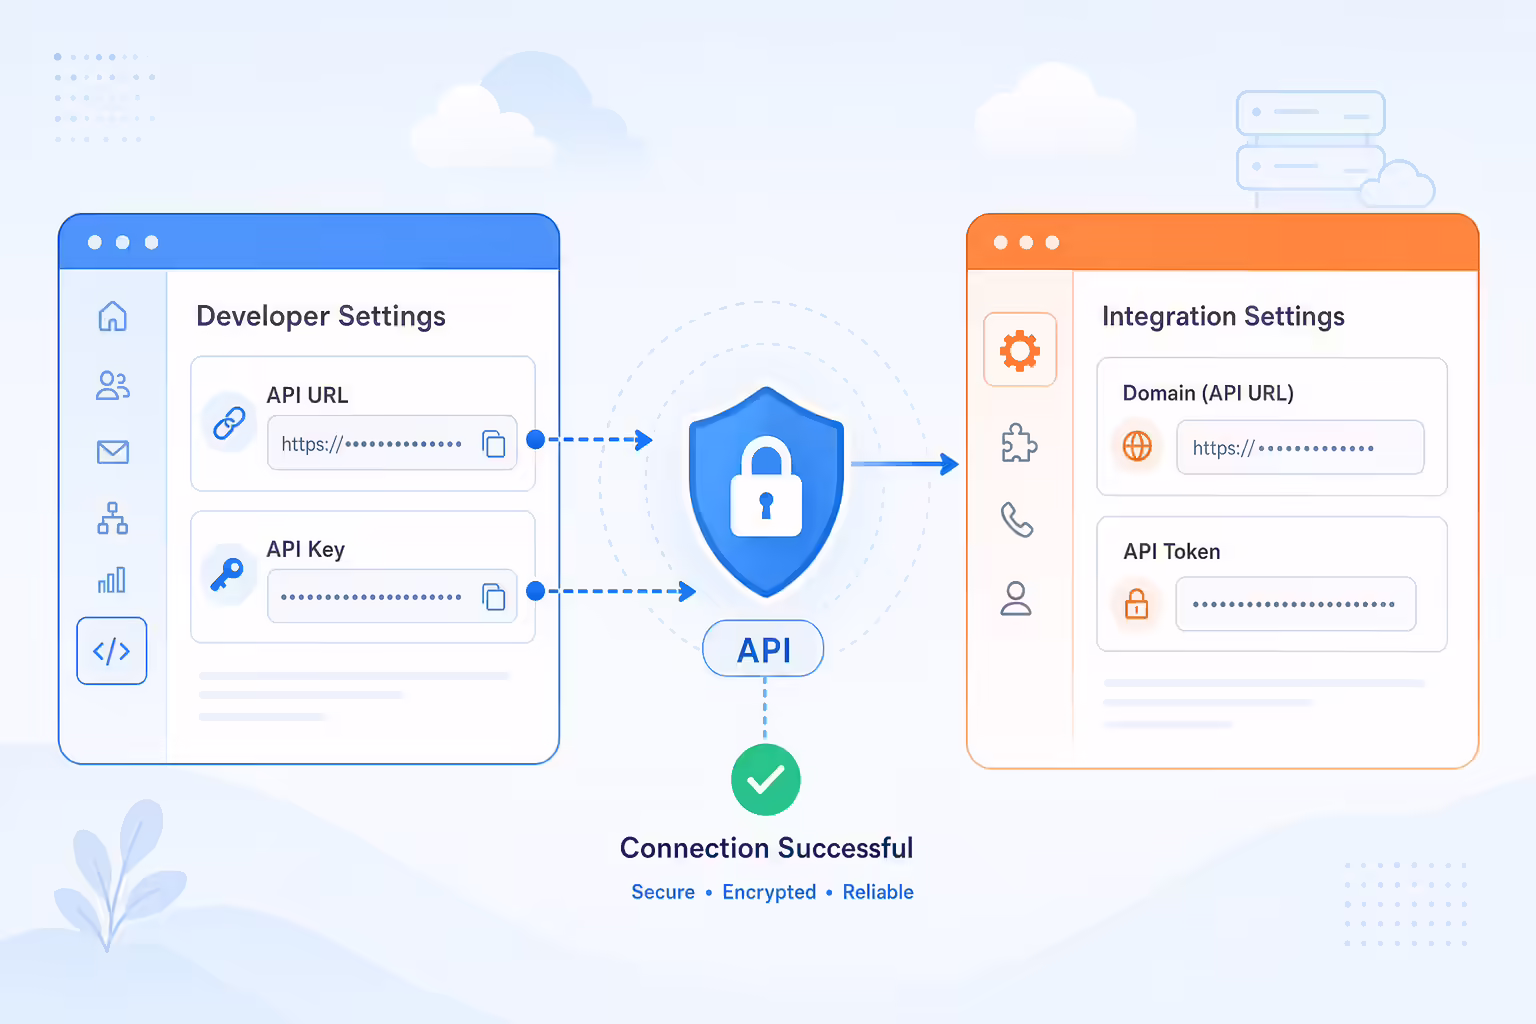
Quick Reference: Connecting ActiveCampaign API to Kixie PowerCall
Step
Action
Location
1
Click Gear Icon
ActiveCampaign
2
Click “Developer”
ActiveCampaign Account Settings
3
Copy API URL & Key
ActiveCampaign Developer Settings
4
Navigate to Integrations/CRM
Kixie PowerCall
5
Paste API URL into “Domain” field
Kixie PowerCall Integration Settings
6
Paste API Key into “API Token” field
Kixie PowerCall Integration Settings
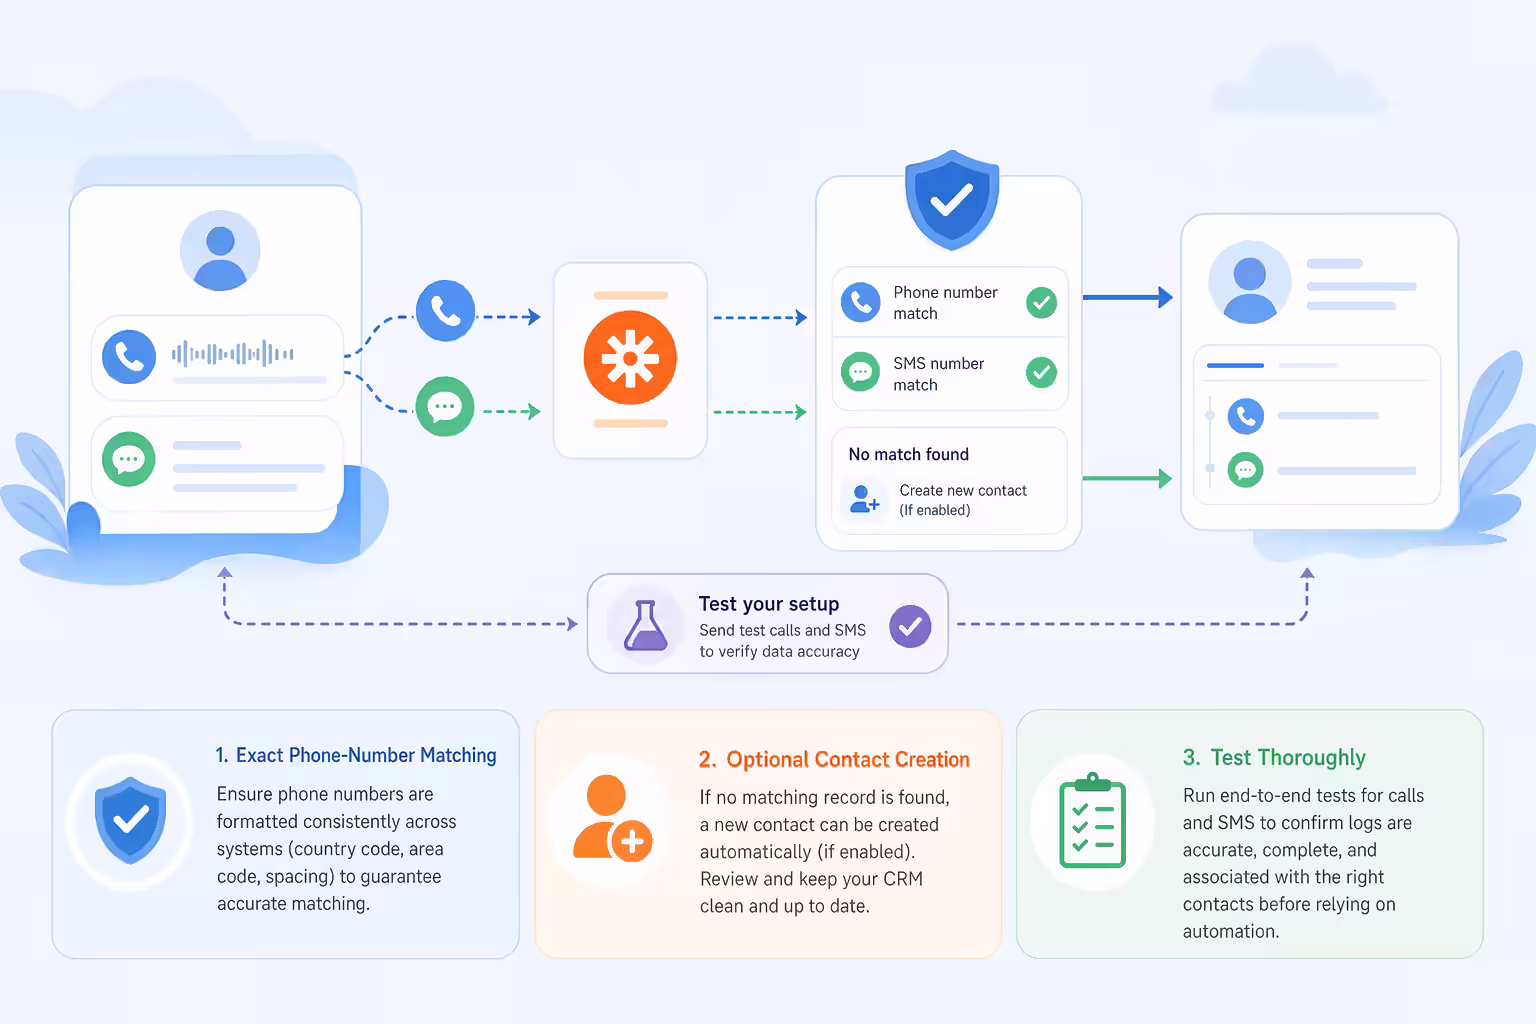
Important Considerations
– Ensure phone numbers match exactly between Kixie and ActiveCampaign records.
– Consider enabling automatic contact creation in Kixie if a matching number isn’t found.
– Always test your setup thoroughly to ensure data accuracy.
By taking advantage of Kixie’s webhook functionality with Zapier, you’ll significantly reduce manual logging efforts, boost your sales team’s productivity, and enjoy the robust benefits of Kixie’s native CRM integrations. Ready to put Kixie’s PowerCall and webhook automations to work in your ActiveCampaign workflow? Book a live Kixie demo or review Kixie pricing plans to find the right fit for your team.
Ready to close more deals with Kixie?
See how Kixie's AI-powered tools can transform your sales and support operations.