How many calls does it take to close a deal?
That depends on your industry, your business, and of course on the diligence of your sales team. It’s no surprise that most closed-won deals take more than one outreach attempt, with most deals (on average) only closing after 5 or more follow-ups.
With the growing number of sales tasks that can be automated, it’s simple to streamline your sales reps’ ability to follow up with new leads in a timely manner. In fact, by relying on sales automations, you can guarantee no lead gets forgotten.
Here’s how you can leverage the power of your sales dialer and your CRM to update the status of a lead, send that lead an email or an SMS, or add them to a new list – all based on the number of call attempts that have been made. In this example, we’ll be working with Kixie, Zapier, and HubSpot, but this could also be done with other similar software.
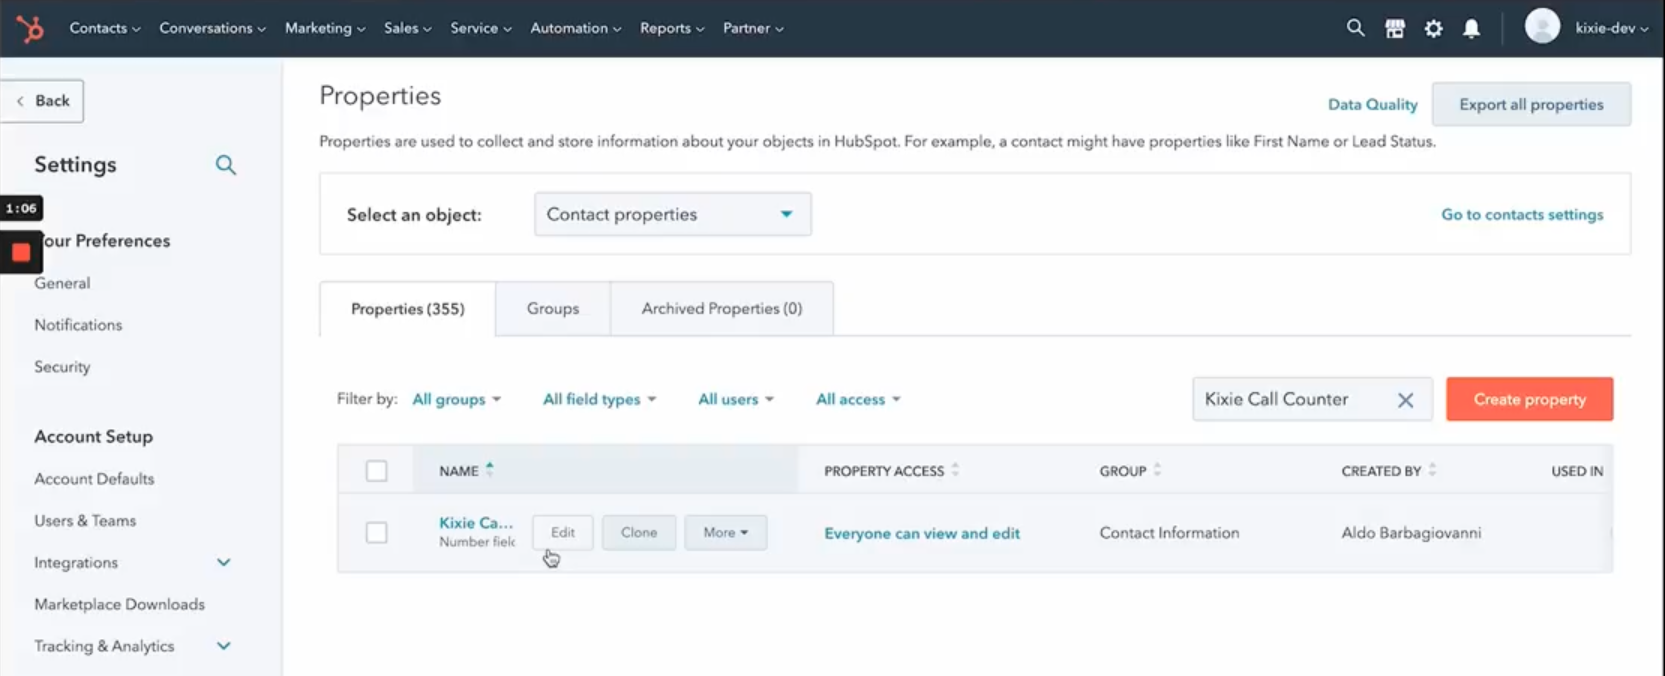
Step 1: Create a Field in HubSpot
Navigate to “Properties” within the Settings menu inside of HubSpot, and create a new field named “Kixie Call Counter” or something of the like. Make this a number field or a text field. We recommend creating it as a number field for easier reporting capabilities down the line.
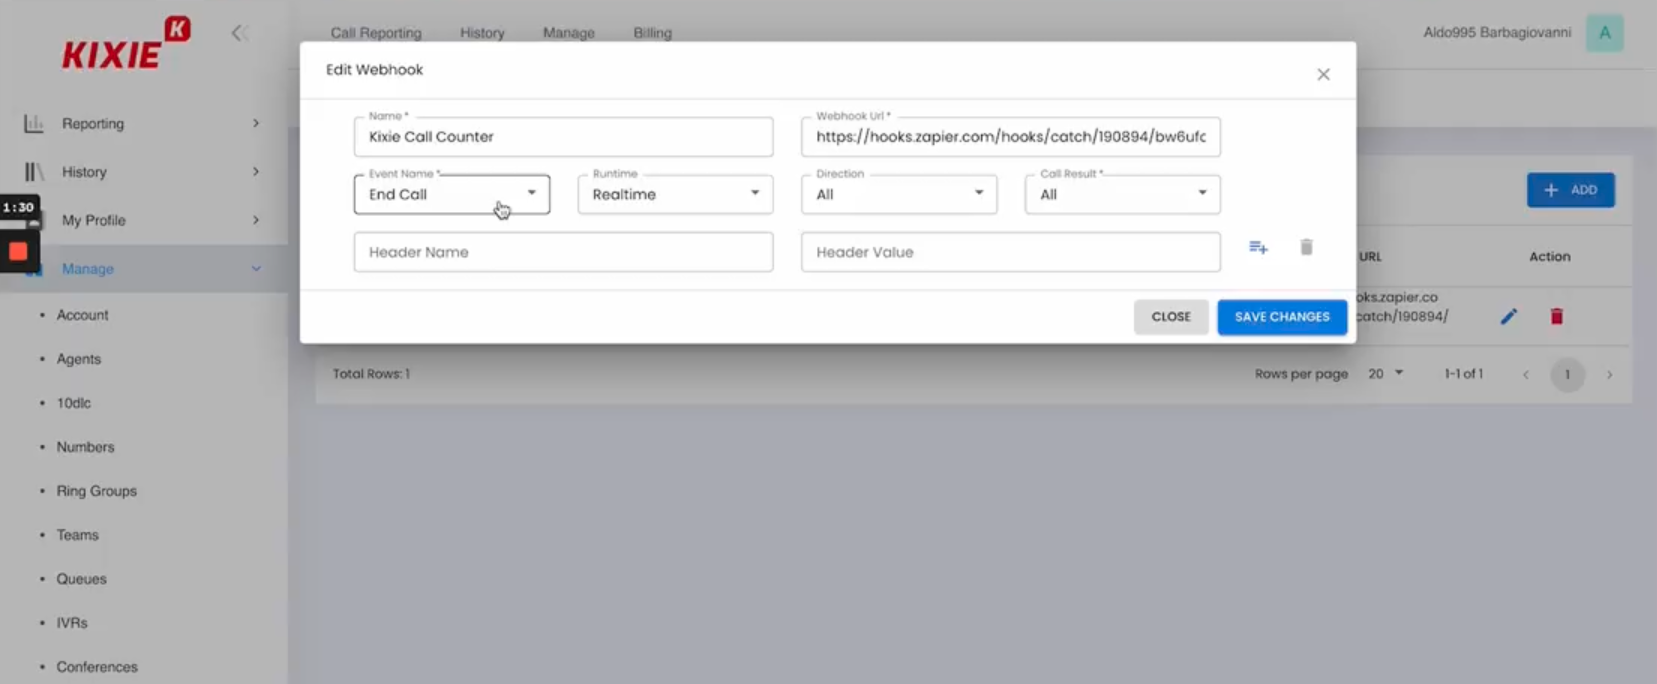
Step 2: Create a Webhook in Kixie
Within the Kixie dashboard, navigate to Manage > Webhooks in order to setup an “End Call” webhook that pushes completed call data into another application. Here’s the fine print on those webhook settings:
Event name = End Call
Runtime = Realtime
Webhook URL = Copied from Zapier
Direction = All
Call Result = All
This allows phone call data (including the call duration, the Kixie phone number, the customer’s phone number, the email of the Kixie agent, the unique contact ID, and more) from every call made with Kixie to be sent to another application.
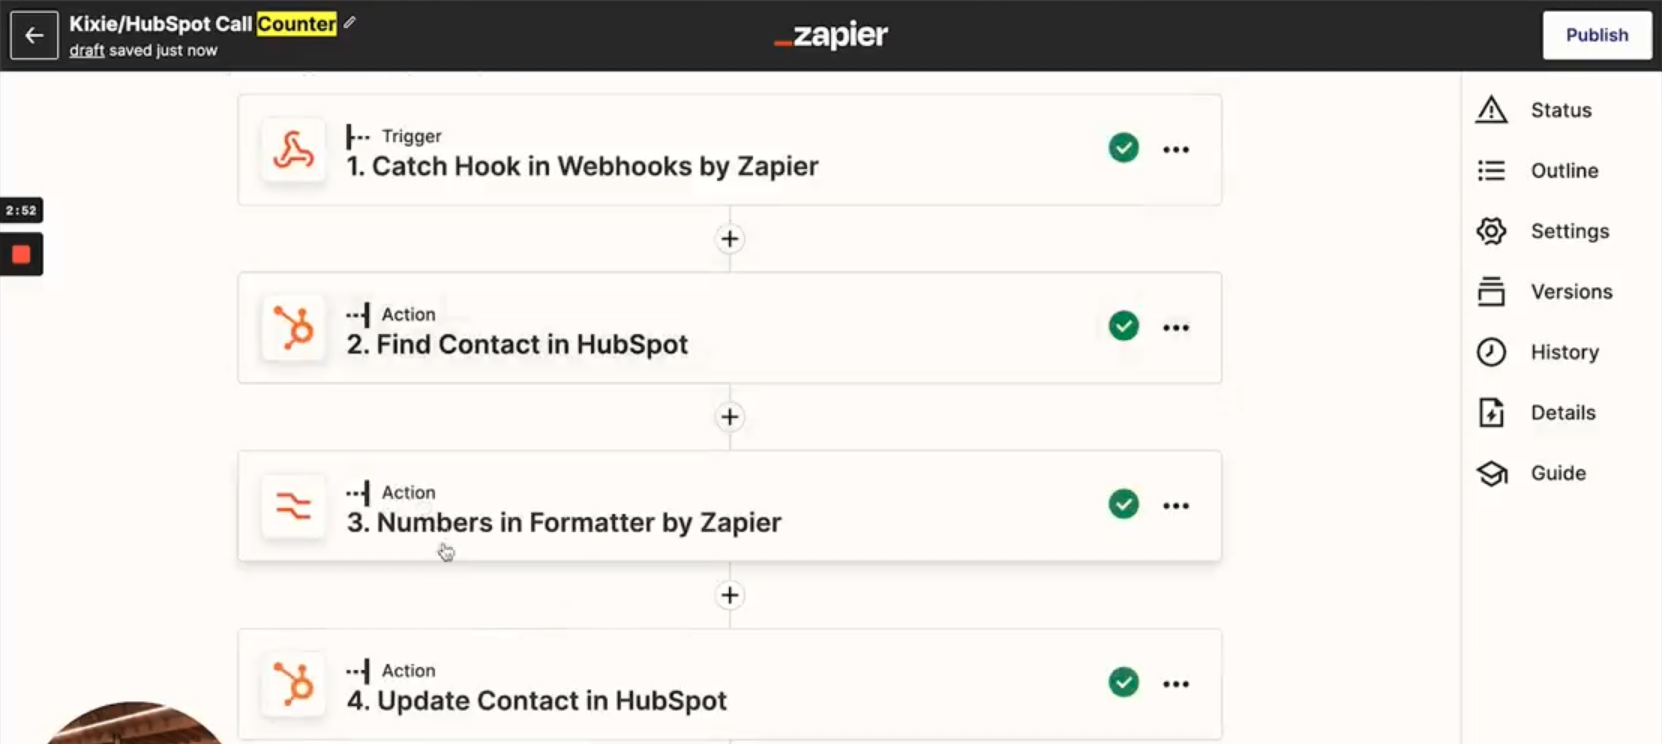
Step 3: Setup a Trigger in Zapier
Within Zapier or a similar tool, create a Zap that catches webhook data from Kixie, and uses that information to lookup a contact in HubSpot. Next, add a number formatting step in order to assign a numerical value and count the number of calls received. Then, update that same contact in HubSpot to reflect the new number of times this contact has been called.
Step 4: Use the Call Counter Field to Create Workflow Automations
Now that you have created your Call Counter field inside of HubSpot, you can use this field to trigger workflow automations within your CRM.
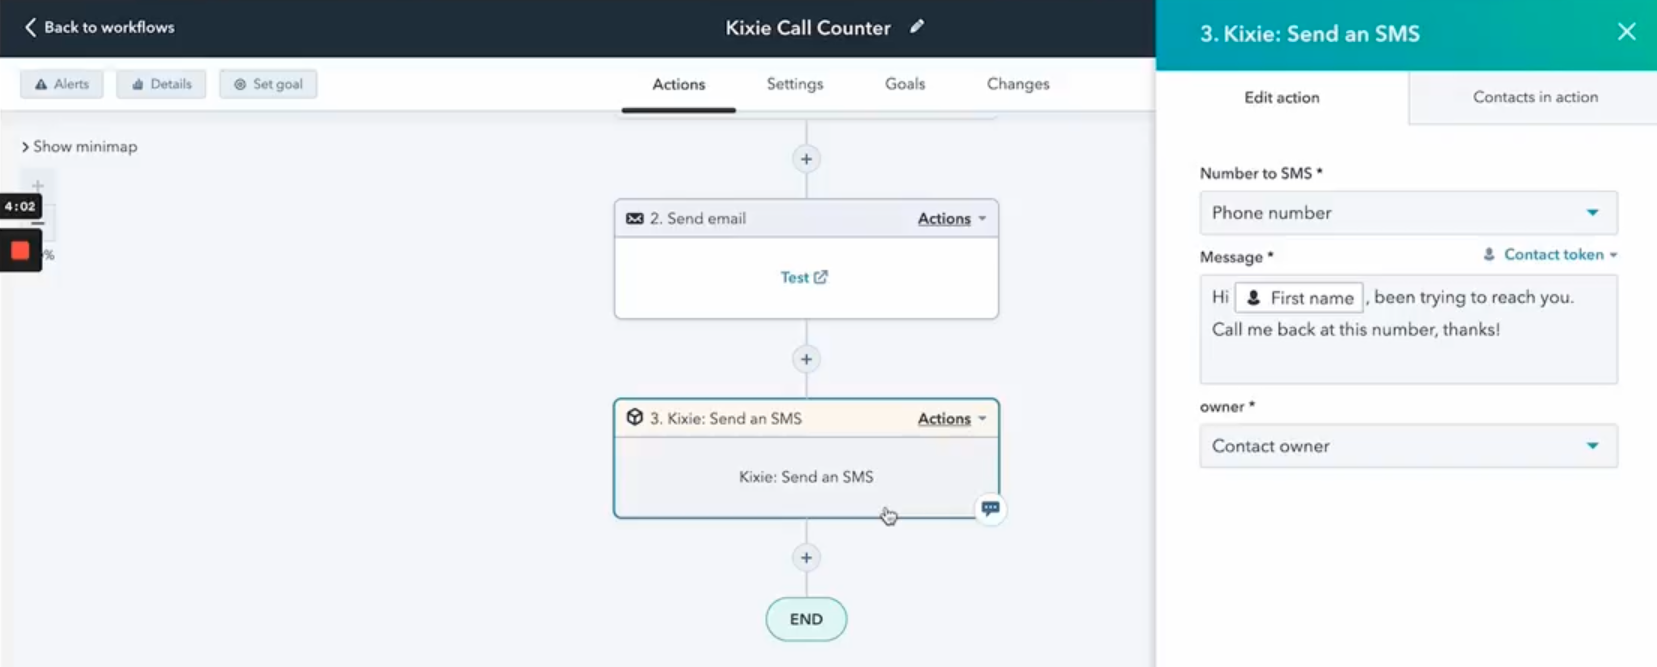
For example, you can create a workflow that is triggered only when the Call Counter field is equal to 3 AND when the lead status is “In Progress”, meaning your sales team has attempted 3 calls but has not yet had a meaningful conversation. You could set this automation to update the lead status, send the lead an email, or perhaps send them a text message letting them know you’ve tried to get in touch.
Watch the video tutorial (4 min.)
Get Started With Sales Automations Today
We hope after reading this you’ll be able to implement a new solution for your sales team. If you need more assistance or would like advice on a specific sales engineering solution, reach out to our team for a free demo to see what’s possible with Kixie. We offer free solutions engineering with all of our paid membership plans to help you set up the sales automations of your dreams!
Ready to close more deals with Kixie?
See how Kixie's AI-powered tools can transform your sales and support operations.
Start Free Trial